The choices we make every day affect our planet. Daily habits that we often don’t even think twice about can either help or harm the Earth. That is why is it important as a parent to teach our children good habits that are mindful of our impact. If we establish good habits now, we are helping both our children and our planet.
Essentially, every area of our lives can be analyzed for improvement when it comes to helping maintain a healthy environment. Today, I am going to focus on just one: our children’s school lunches. Every day many of us pack a lunch and send our kids off to school. Ever stop to think how much trash is produced from those lunches? Are we focusing more on convenience than nutrition? There are many things to consider when we choose what to put in our children’s lunch boxes. In efforts to reduce the amount of trash produced and provide our children with proper nutrition, focus on these five things:
*Note: This post contains affiliate links. If you make a purchase from Amazon, I receive a very small fee at no extra cost to you.
1. Reusable Packaging
Ditch the little plastic bags! If you use plastic bags to hold a sandwich or snacks, count how many you use every day in your children’s lunches. Now multiply that by 180 (the typical number of school days in a year). How many plastic bags do your children throw away each year? For example, if you only use 2 every day then your children are throwing away 360 plastic bags! Do you use 4 a day? That’s 720 plastic bags a year! If you switched to a reusable source, you are now saving those 360 or 720 bags from ending up in a landfill.
What should you use instead?
Stainless steel containers
Stainless steel or glass is your most eco-friendly option. You may not want to send a very young child with a glass container, so stainless steel is a great choice. Some products available:
ECOlunchbox:

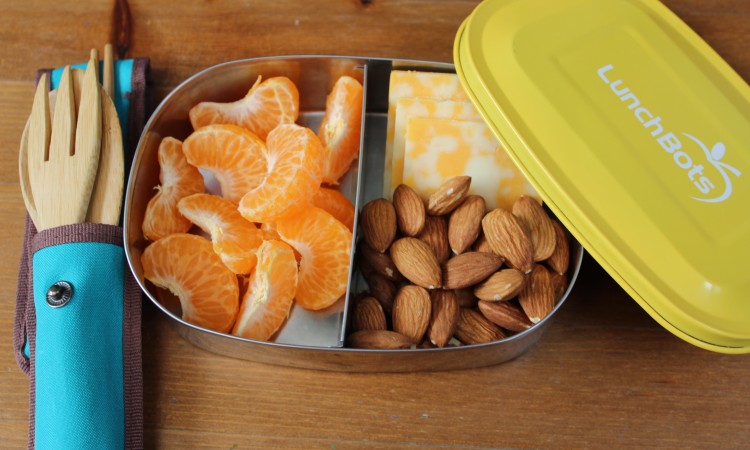
Lunchbots:
We have two Lunchbots that look similar to the one pictured. They have worked well for us and have held up for years. There are more types of these available with different numbers of divisions for food.

Washable food bags
We love these! This company has so many fun patterns to choose from so there is bound to be one that your child enjoys.

Plastic containers
Of course, there are always plastic containers to help you avoid disposable one time use bags.
Rubbermaid sandwich kit:

We have both of these sets. I use the cold pack from the Rubbermaid set every day. The Ikea set has so many sizes, that I can always find a container to fit what I want to pack! The extra small size has come in very handy.

2. Reusable or Compostable Utensils
To reduce waste even further, have your child stop throwing away plastic spoons, forks, and knives. Or, if they do throw them away, pick a better material that can be composted or biodegrades easily. Here are some choices:
To-Go Ware

This set of bamboo utensils has everything you may need: knife, fork, spoon, and chopsticks. The outer sleeve holds the pieces very tightly when closed preventing the utensils from spilling out and getting lost. We have a set of these, too!
Compostable utensils:


These utensils are made mostly from non-GMO corn and can turn into soil in 3-6 months when composted (according to the information on their packaging). Even though they are considered disposable, I still have my children bring them home every day to wash them and reuse them. When the time comes to dispose of them, I know that they will biodegrade much faster than plastic utensils would.
3. Cloth Napkins
An often overlooked place to reduce the amount of trash in your child’s lunch is his or her napkin. Simply giving your child a cloth napkin can take away one more piece of trash every day! You can easily find these in many stores, but if you prefer online shopping Amazon’s got you covered with this set below.

4. Fresh Food
All of the things we put in our children’s lunches is meant to provide them with the best nutrition we can give them. It’s tempting to put convenience over nutritional value at times. It seems easier to buy prepackaged processed food and quickly throw it in a lunch box while we make a mad dash to school. Now matter how early you wake up, the morning seems hectic and lacking adequate time to get out of the door. Examine your child’s lunch. How many items in there are actually just empty calories that fill your child’s stomach but don’t really provide nutrition? What can you pack instead? Give yourself time to plan ahead of time what kinds of nutritious foods you can pack. Develop a routine of preparing and packing those foods until it becomes second nature. Remember, it all begins at the grocery store. If you don’t buy junk, it won’t end up in a lunch box.
Looking for suggestions on what to pack? Parents magazine’s Lunch For a Month gives 30 healthy lunch ideas given by celebrity chefs (click here for the article).
5. Avoid Overpacking
One thing I noticed about my children’s lunches in the beginning of the school year was how much they actually ate. They came home with a lot of uneaten food. Of course, they claimed that they did not have enough time to eat. Which I do not think they are fibbing about, they have a short lunch (in my opinion). Knowing that they only have a certain amount of time to eat, I want every bite to count. I needed to pack less food, because over packing would result in more waste not more eating. If I packed too much they will naturally eat the things they like the most and the rest may end up in the trash. I do not want to waste food, so I pack only what they eat.
This brings me to a huge issue in schools: food waste. If your child buys lunch at school, they may be throwing away a lot of food. For example, in the Los Angeles Unified School District in 2014, they estimated that students threw away $100,000 worth of food a day. Perfectly edible food just thrown away! Click here to read the full article highlighting this problem. There are steps that a school can take to help alleviate this. Ask your child’s school if they participate in the U.S. Food Waste Challenge. Click here to learn more about the U.S. Food Waste Challenge and what schools can do to help.
Little changes can make a big impact if enough of us do it together!