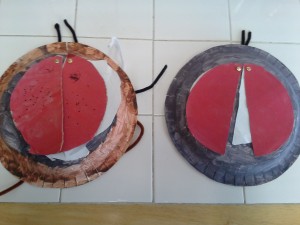
One of our random library picks, Insect Invaders by Anne Capeci inspired us to create or very own ladybugs! By creating these bugs, the kids engaged in hands on practice with math, science, and art. I’ll show you how this seemingly unassuming craft is really a learning activity and possible math assessment!
This post contains affiliate links. If you purchase a book from the Amazon link, I receive a small portion of the sale at no additional cost to you.
For our nightly read aloud, I read Insect Invaders to both of my boys, age 4 and 9. It turned out to be the perfect companion to my son’s study on food chains and ecosystems. In the story, we follow the students as they search for two missing ladybugs and a spider. Along the way, there is tons of information about predator and prey relationships on top of the abundant information about insects and spiders. After learning so much about insects, ladybugs especially, I decided to have my boys create their own ladybug to reinforce some of the concepts learned in the book. I also used this opportunity to assess my oldest son’s knowledge of circles. If your child is unfamiliar with the parts of a circle or the formulas for finding area and circumference, you could use this activity to introduce some of those concepts.
Here’s what we made:
I like to be realistic in my posts. I could attempt to create a perfectly created, pinterest-worthy ladybug to dazzle you with, but not that’s not real life. I’d much rather show you a finished product made by kids to set realistic expectations.
Materials used:
- paper plate
- black and red paint
- pipe cleaners
- paper fasteners
- cardboard
- computer paper
- string and yardstick for measuring (optional)
- pencil
Steps we took:
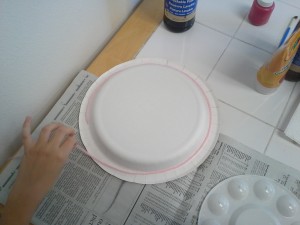
To start, we needed to set up the body parts that needed to be painted. The paper plate would be the ladybugs body and the cardboard would be the ladybug’s elytra (wing covers). In the story we learned that ladybugs protect their delicate wings with their elytra. To show that the elytra protects the wings we decided to use cardboard for the elytra and the computer paper for wings. The stronger material (cardboard) had to fit over the weaker material (paper). We needed to figure out how big to cut our cardboard and paper before we could paint.
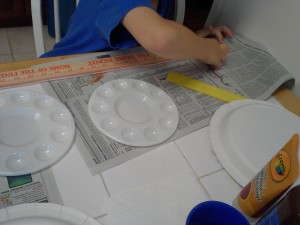
To do this we could have easily traced the circle on the paper plate onto the cardboard, but I wanted use this project to asses my nine year old’s knowledge of circles. We did things in a more complicated manner so I could gain this information. I asked him how big the circle was so that we can make the same size circle on the paper. To find this out, he said we would need to measure the circle. “How do you measure something round?”, I asked. This could lead to many different responses. For us, it led to measuring the circle with string, cutting the string, and measuring the string with a yardstick.
After he read the yardstick, I asked what part of the circle he just measured. He told me that he measured the circumference. At this point I also asked him if he remembered the equation for finding the circumference of a circle. These questions allowed me to see what my son remembered about circles.
Realizing that it would be very hard to reform the string onto the cardboard accurately, this was a dead end for us. Plan B was to find the radius of the circle. My son found the radius of the circle and cut a piece of string the same size of the radius. Holding one end of the string on the center point of the cardboard and the other end by the tip of the pencil, essentially making a homemade compass, he rotated around the center point to create a new circle. In theory, this circle should have been the same size as the original circle on the plate. In reality, due to error in holding the string, the circle was not actually the same size. All of this is ok and part of the process of learning. Next time we need to make a circle I will introduce a compass to my son. After this experience, he can relate the purpose of a real compass to our homemade attempt at a compass. He will hopefully see why the tool is necessary and more reliable.
Once we had our cardboard circle for the elytra, the boys traced the cardboard circle onto the paper to create the wings. Our body preparation was complete. Now, they could paint! They painted the upside down plate black for the body and the cardboard circle red. As my nine year old painted to cardboard circle I asked him what part of the circle he was painting. He told me it was the area. I then asked him what the formula for the area of a circle is. My informal math assessment was complete; I had a good understanding of my son’s knowledge of circles. If your child is new to the concept, you could change the assessment aspect of the craft to more of a teaching activity demonstrating the different parts of a circle as they work.
The paint dried overnight and we returned to our craft. The boys cut the cardboard and paper circle in half. I punched a hole in the top of the cardboard, paper, and plate so that all three could be attached together using a paper fastener. The wings and elytra were finished. Both boys put antennae on the ladybug. My four year old happily put on six legs and wing spots just as we learned in the book. My nine year old left his ladybug legless and spotless. Ladybug spots are symmetrical. Even though, my none year old did not put spots on his, we still discussed this.
Adding to this, my four year played with ladybug, acting out things he learned from the book. He was pretending to feed the ladybug aphids using matchbox cars! When one of the wing covers fell off, he first called it the wing, thought for a second, and corrected himself. Creating this project definitely helped him learn some of the important body parts of the ladybug.
To summarize the concepts learned or reinforced by creating this project:
- Insects have 6 legs
- Ladybugs, like many insects, have antennea
- Ladybugs have protective wing covers called elytra
- Ladybugs eat aphids
- Parts of a circle- radius, diameter, circumference
- Pi
- Formulas: Area of a circle & Circumference
- Symmetry
We started with a book, created our own ladybug, then read three more books about ladybugs to add to our learning. All of the books we read can be related back to the concrete object we made– our ladybug!


