Empowering Parents to Teach- Five Senses

Exploring Your Five Senses

It all started with this book:


Empowering Parents to Teach- Five Senses

You Can’t Smell a Flower With Your Ear by Joanna Cole

We read this book before bed one night and my kids really liked it.  It had a couple of “try this” activities in it which the boys enjoyed.  While my nine year old knew the information, my four year old learned a lot about his five senses. A couple days later we went to our local Botanic Gardens where they have this awesome Sensory Garden.  It was the perfect place the kids to explore their five senses.

The Garden:

Empowering Parents to Teach- Five Senses

The key:

Empowering Parents to Teach- Five Senses

The signs that guide us:

willow

touchme

teatree

smellme

There wasn’t a plant for us to eat, but we did sit on a bench in the garden and eat our snack.  Right next to us was a water feature that allowed to to hear the sound of running water. We sat and listened to the sounds of the gardens, which was mostly birds and the water fountain.

You don’t have to have a specific Garden of the Senses to explore your five senses.  You can do it anywhere! If you want to make this an official lesson have the kids record what they saw, felt, touched, tasted, and heard to see if they can categorize what they experienced.

Or better yet, have them create their own sensory garden!  Have the children brainstorm what they would put into a sensory garden. Then, they can decide what kinds of things would put into the garden to stimulate all five senses. If they are old enough, they can draw a blueprint of the garden. If you have enough space, plant the garden at your home or school.  Your children can even make their own version of the signs and key :)

We really enjoyed the Garden of the Senses, but look what else the rest of the Botanical Garden had for us:

Click to see any of the pictures larger!

Empowering Parents to Teach- Five Senses

Empowering Parents to Teach- Five Senses

Do you see the butterfly?

Empowering Parents to Teach- Five Senses

Empowering Parents to Teach- Five Senses

My four year finding bugs. We saw a cool centipede!

My four year finding bugs. We saw a cool centipede!


If your looking to teach your little one all about their five senses, read the book then take a fabulous walk in a beautiful setting and talk about how you are using your senses!! I always love combining a book and real life experience :)


Empowering Parents to Teach- Books About Gettysburg

Visiting Gettysburg

Are you thinking of visiting Gettysburg National Military Park for a family trip or part of your home school curriculum?  We learned so much by being there, I’m glad we made the trip.  Traveling from the Philadelphia area, Gettysburg was about a 2.5- 3 hour drive for us.  Since we only made it a day trip we had to pick and choose what landmarks to see. There is definitely a lot to see and do there; you can easily spend two to three days exploring Gettysburg. Today, I will share the things we did and saw when we visited!


Movie at the Information Center

When we first got the park, we stopped at the Visitor’s Center.  Here you can purchase tickets for a bus tour, see a movie, walk through the small museum, and get information on their Junior Ranger Program.  We did not do a bus tour, because my sister was with us.  She was our expert! We did our own thing, using the map to guide our travels.  We did see the movie at the visitor’s center.  Doing this first helped us understand some of what we were about to see, such as the Little Round Top and Devil’s Den.


Junior Ranger Program– “Enlist in the Army”

Next on our list was the Junior Ranger Program’s “Enlist in the Army”.  The kids actually signed a piece of paper to “enlist” in the Army and train as a Union soldier.  The Captain (a park ranger) led them through what to expect in the Army, each article of clothing they had to wear, and how to load their rifle.  Only one child actually wore the uniform as a demonstration, but they all got to see it. At the very end was when the Captain taught the troops how to load their rifle.  Much to my nine year old’s displeasure it was not a real rifle. After that they learned how to march, turn as a group, and come together.  One child carried the colors (the flag) and another was a drummer. Once they all learned their roles, the pretended to advance on Confederate troops.  After their mock battle, they returned to the seats and the Captain had only a couple of kids stand symbolizing the number of the people who survived.  Overall, this experience provided a great foundation for kids to understand some of the historical aspects of the battles of the Civil War and provide insight into how it might have felt to be one of the soldiers.

Sorry, I don’t have pictures of this.  There were many kids there, and for privacy, I do not want to put up a picture with someone’s kid in it without their consent.
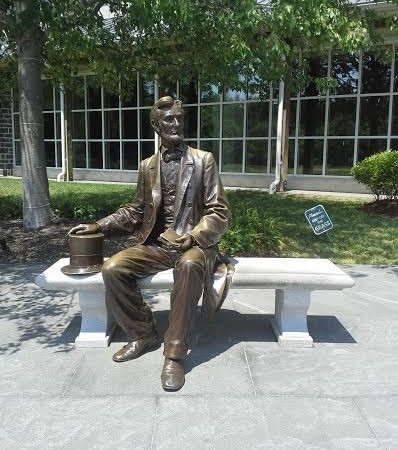
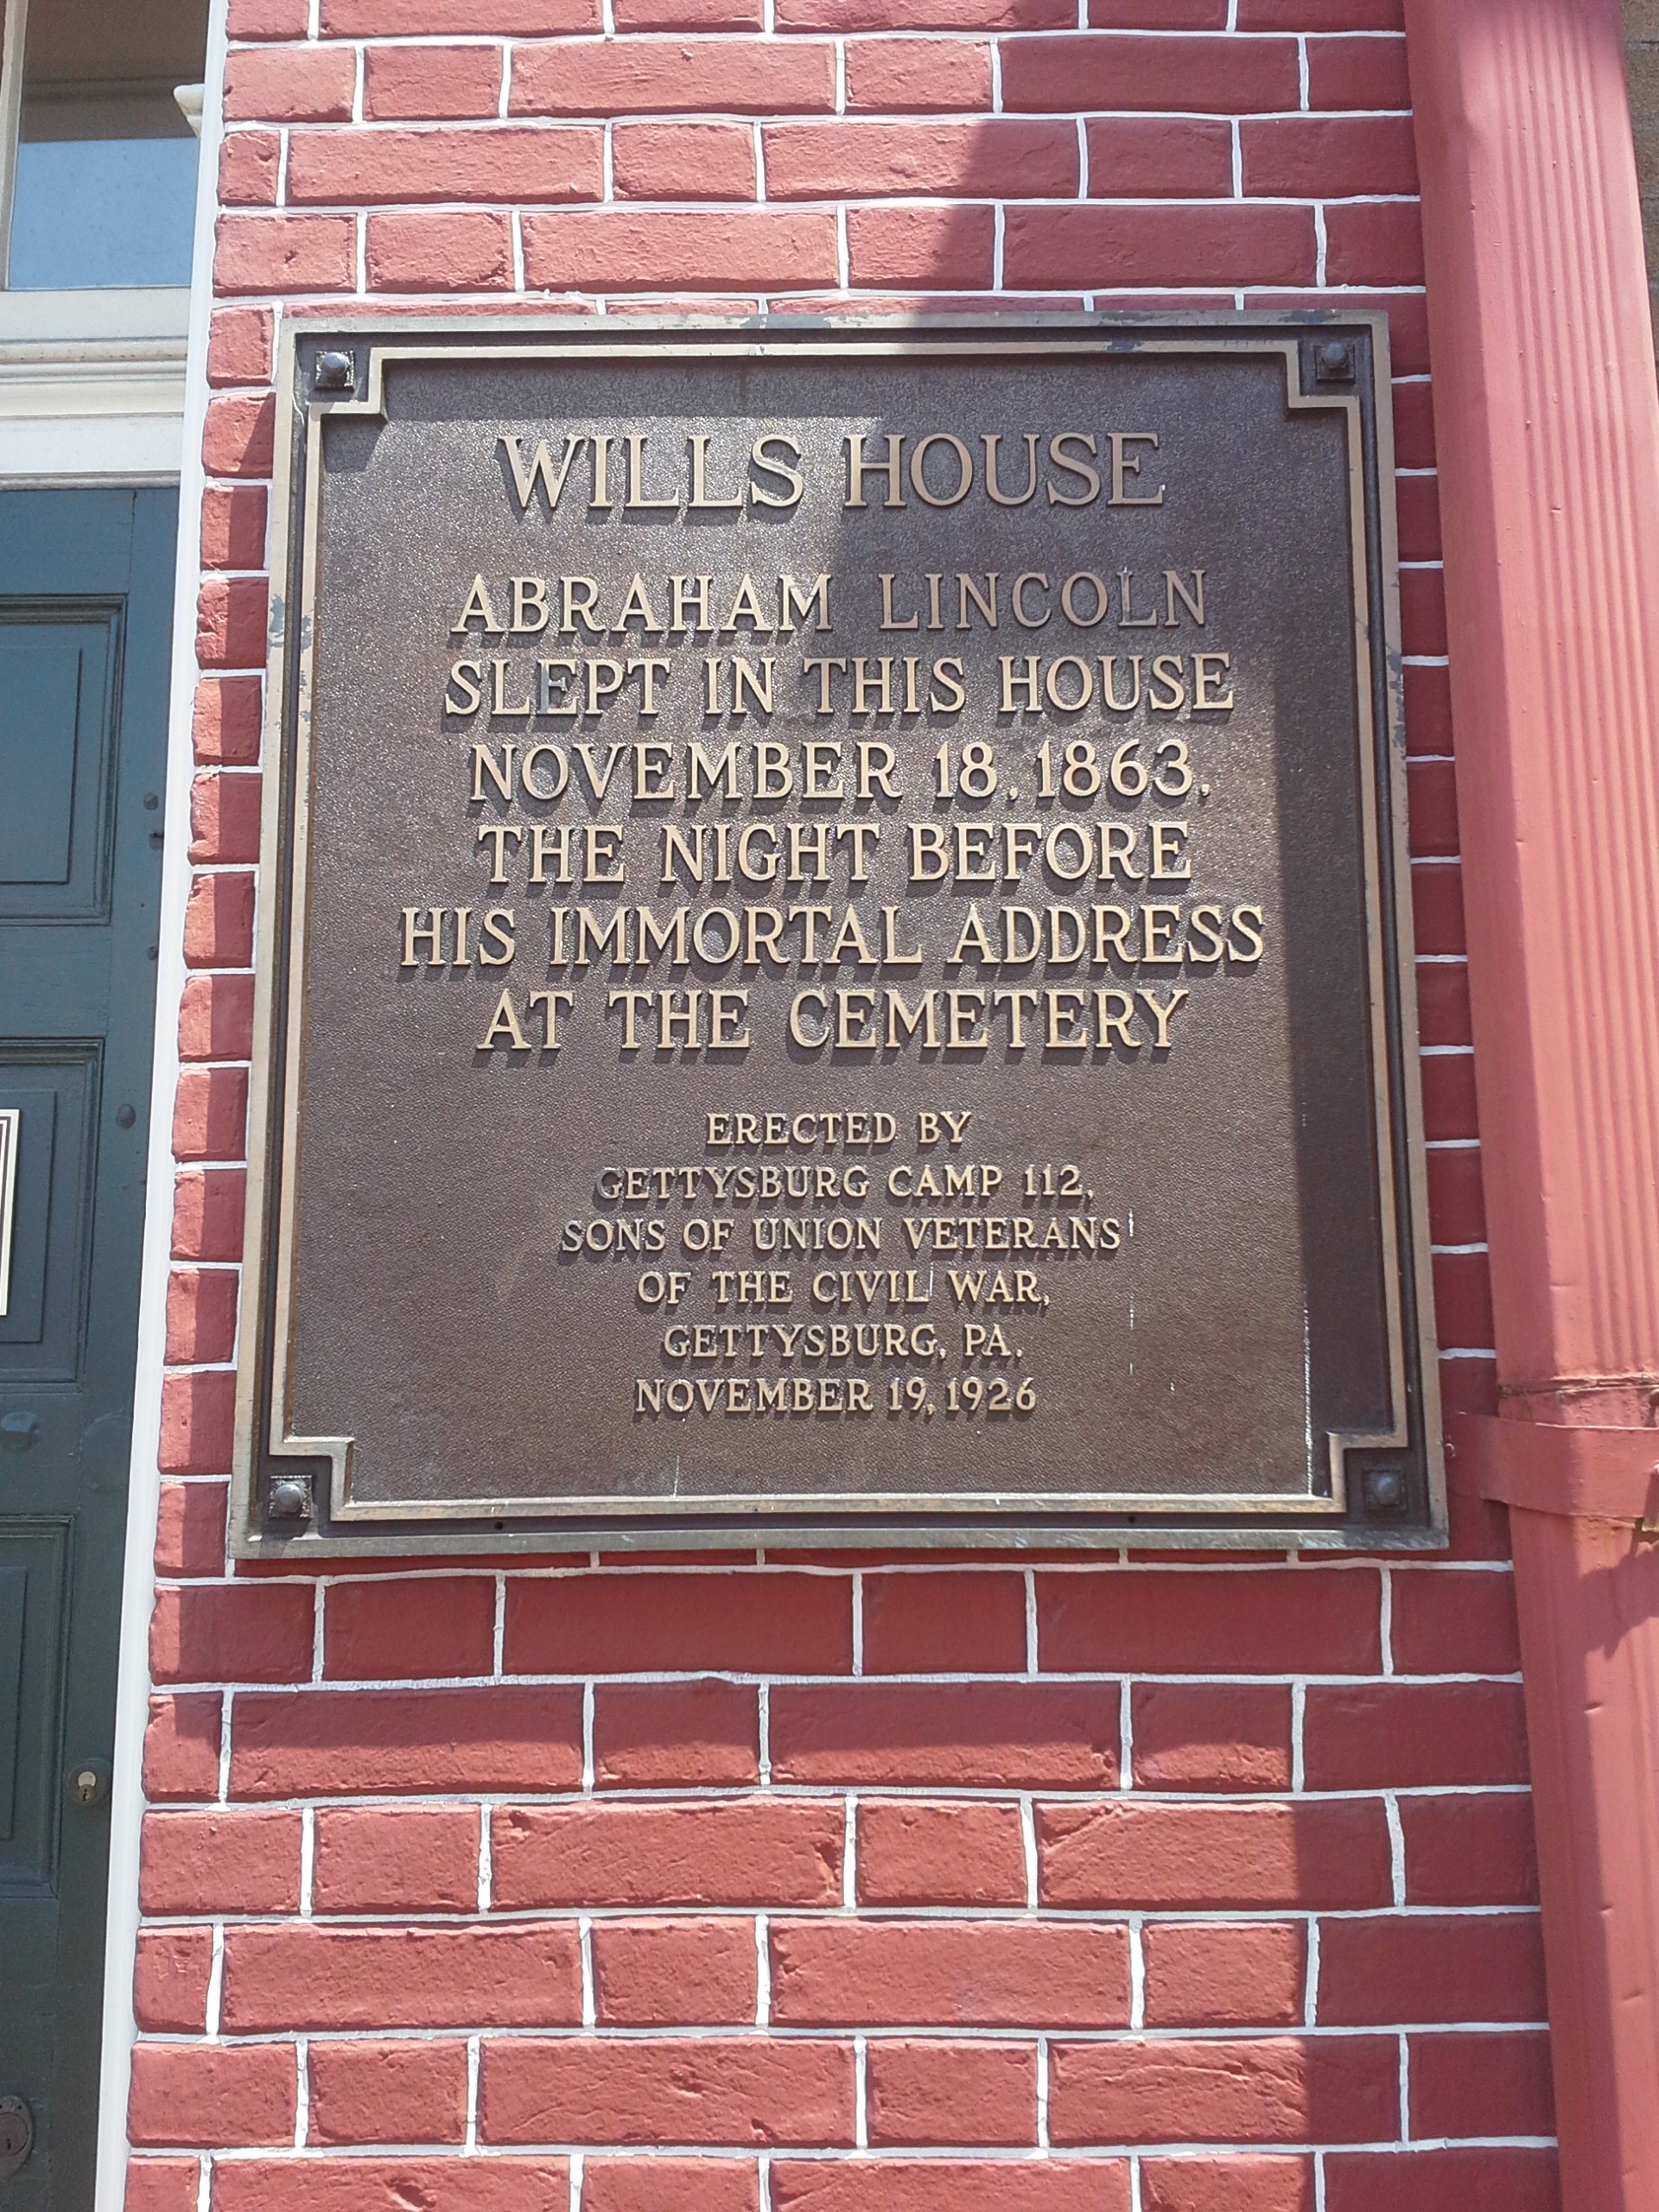
 

David Wills’ House


Empowering Parents to TEach- David Wills' House

After lunch in downtown Gettysburg, we decided to visit the David Wills House.  This house is famous because it is where Abraham Lincoln stayed before he gave his Gettysburg Address.  It is a very small museum, but you get to walk into the room where Lincoln slept. And, according to the information found in the room, the bedspread on the bed is the actual bedspread from when we spent the night!! That’s pretty cool. A lot of the information we learned from the book, Just a Few Words, Mr. Lincoln, by Jean Fritz helped us understand the significance of the house and of the Gettysburg Address.


The actual bedspread from Lincoln's stay

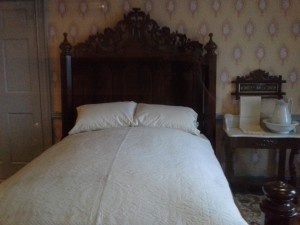
The actual bedspread from Lincoln’s stay
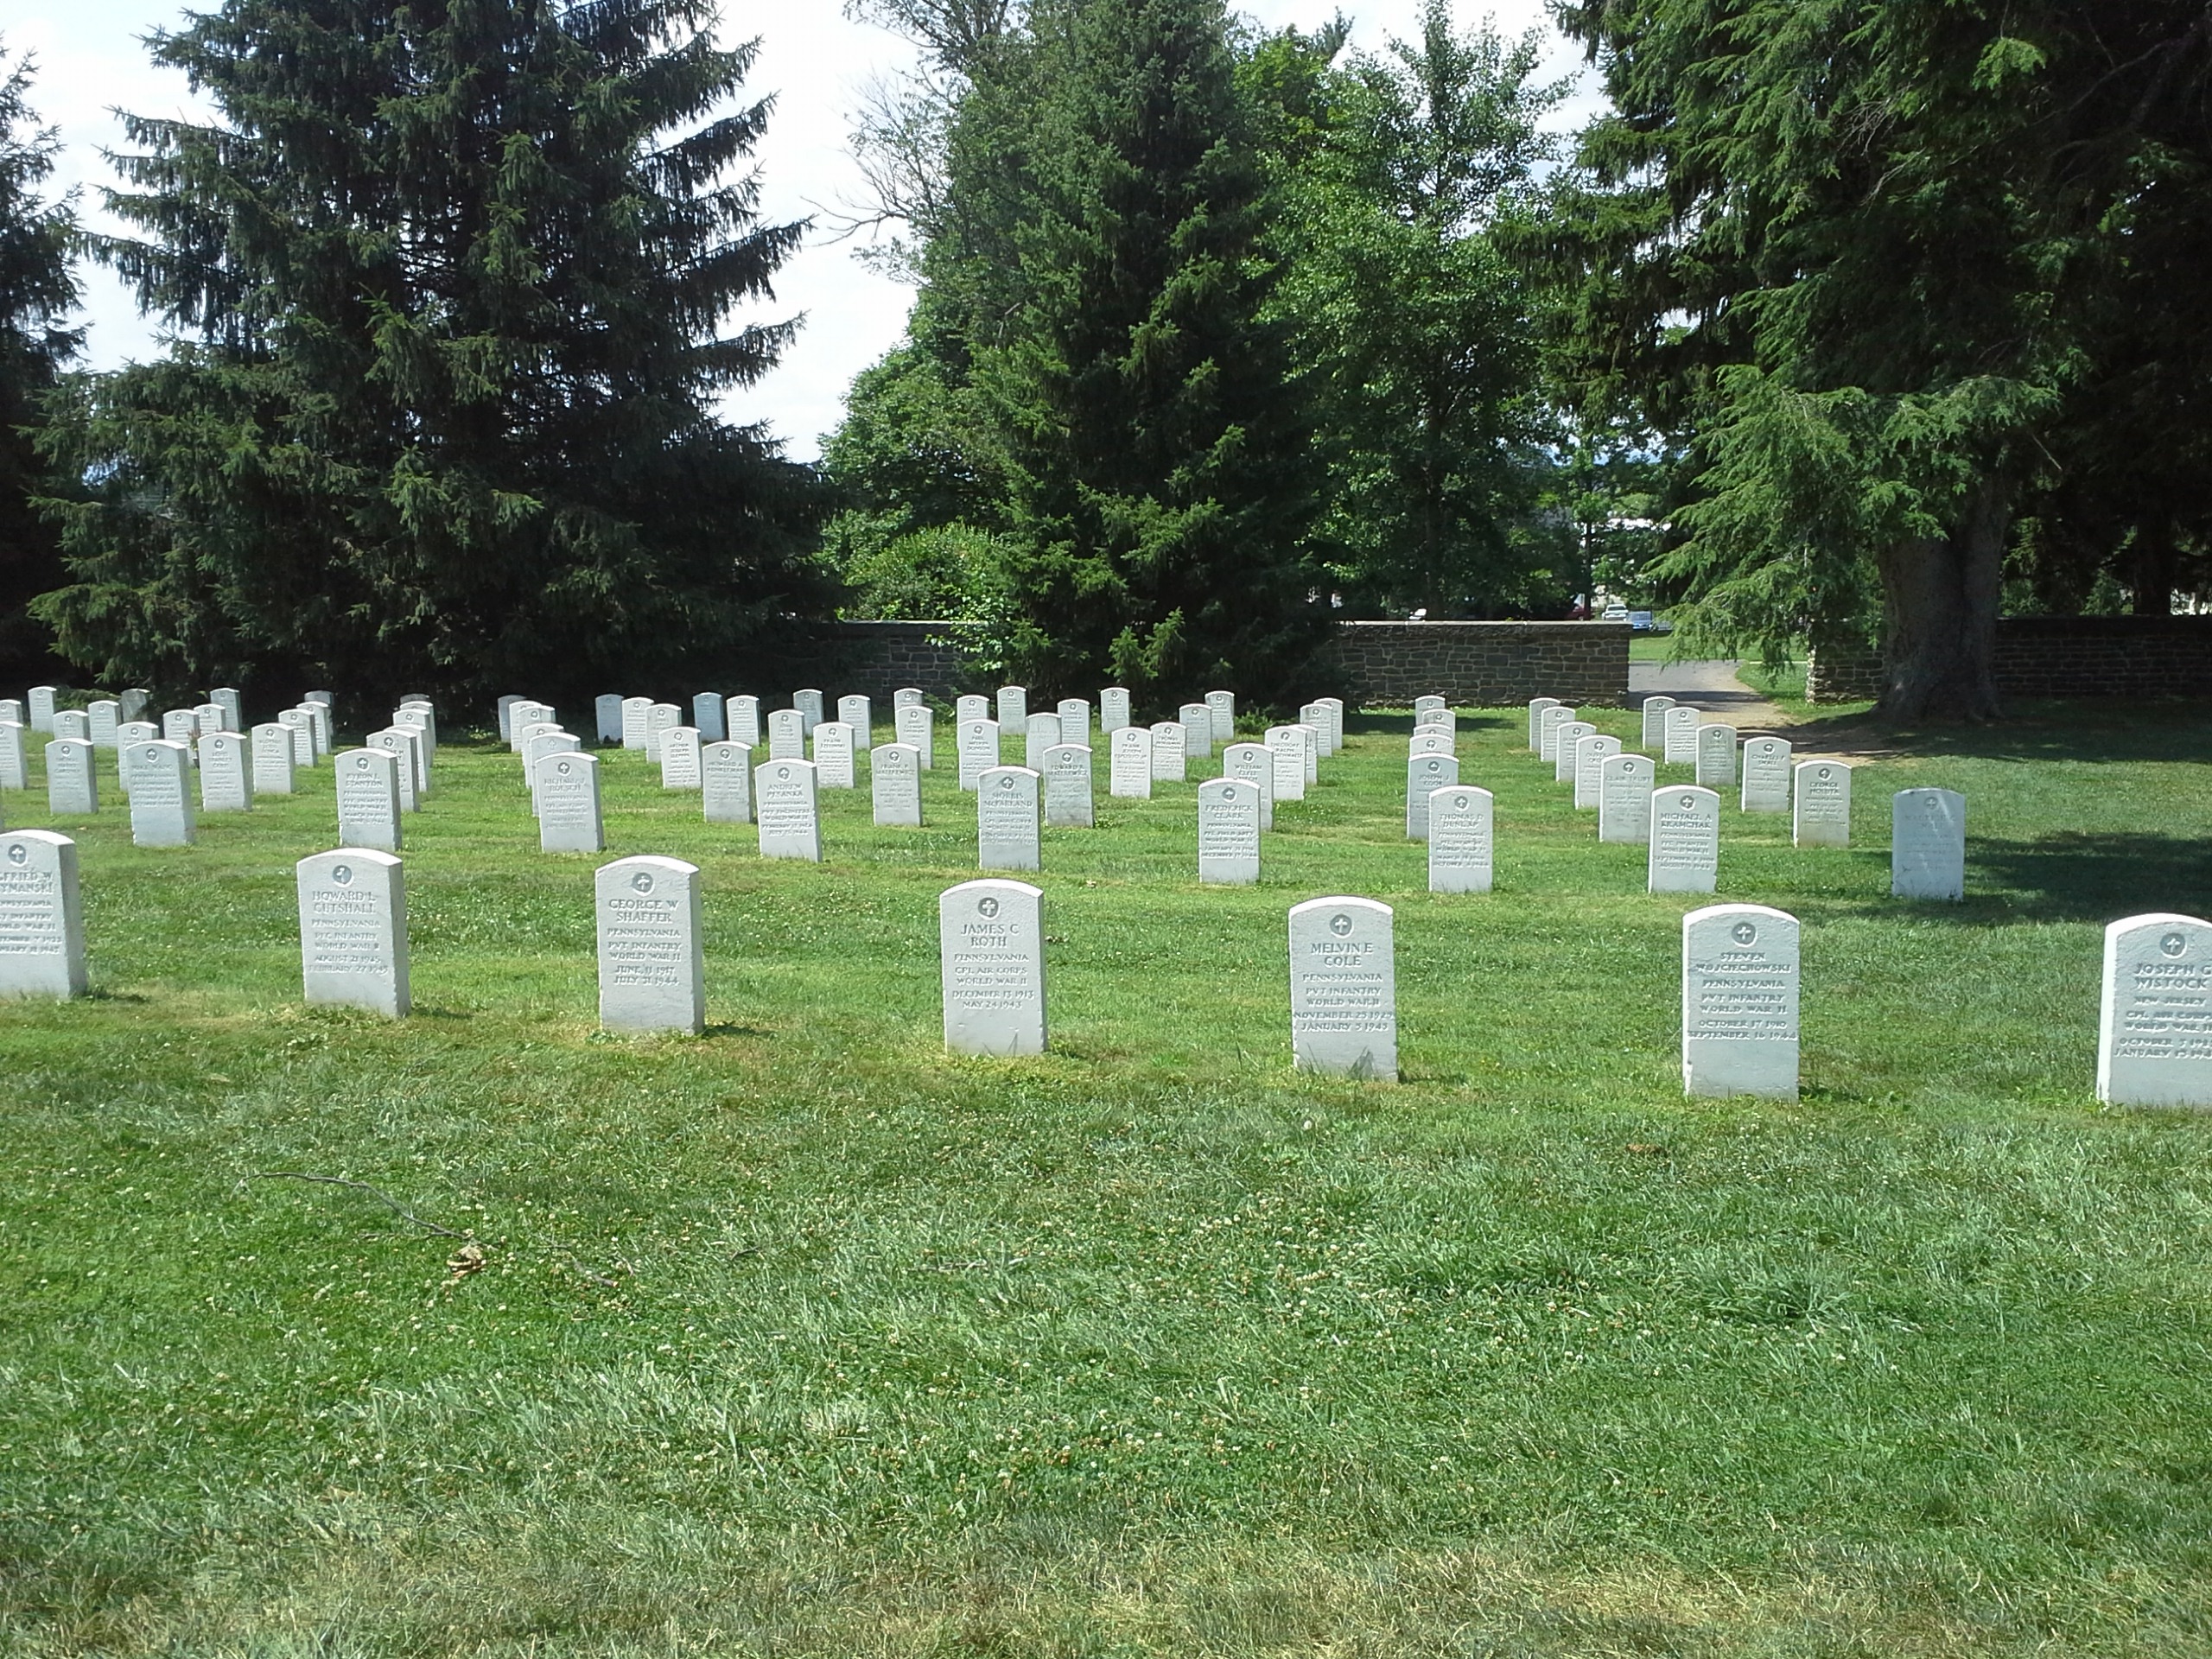
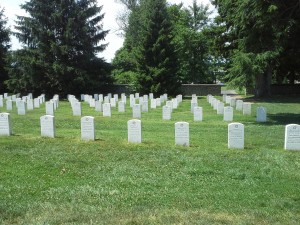
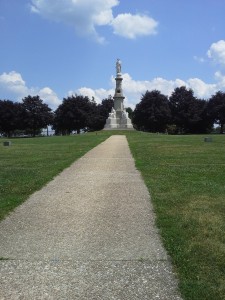
 

National Cemetery

The National Cemetery was our next stop.  We took a short walk around the grounds.


Empowering Parents to Teach- Gettysburg


Empowering Parents to Teach- Gettysburg


Empowering Parents to Teach- Gettysburg


Jennie Wade House

Jennie Wade was the only civilian casualty of the Battle of Gettysburg.  She was shot in her kitchen as she made bread for her family and the Union soldiers. Her house was preserved with two original artifacts still inside- one being the bread table that she standing at when she was shot. You can see bullet holes in the walls of her house, including her fatal shot.  Being there, gave us a perspective on just how vulnerable she and her family were in that house and how scary it must have been to have fighting right outside your house! After Jennie died, her family decided it was too risky to be in the house and went into the cellar to hide.  We actually went down into the cellar, which gave us a glimpse into what it felt like to be in the small, dark, cramped space.  It reminded me of the book we read about the cemetery keeper’s family hiding in the cellar, The Cemetery Keepers of Gettysburg by Linda Oatman High.  Our experience helped us relate the family hiding in the cellar, helping us better understand what we previously read.


Little Round Top & Devil’s Den

Empowering Parents to Teach- Gettysburg

Standing on the rocks at Little Round Top


Little Round Top was a key to the Union’s victory.  It’s easy to see standing high atop the hill how this position was crucial for them.  It was easy for the them to spot the Confederate down at Devil’s Den.


We learned so much about the Battle of Gettysburg by visiting the park. Seeing the landmarks, battlefields, standing where the people in history stood, and watching my son’s reenactment (and him doing it!) was better than any textbook. The course of American history changed during this battle and it’s important for my son to learn the history of our country.


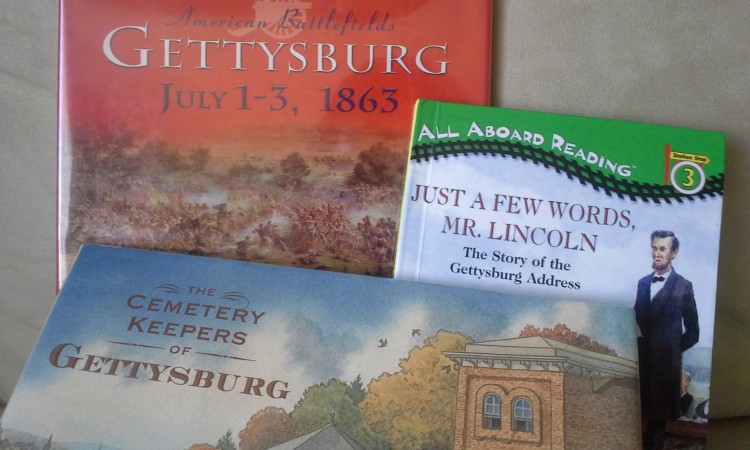
To see the books we read, check out this post: Books About The Battle of Gettysburg

Empowering Parents to Teach- Gettsyburg Books

Books about the Battle Of Gettysburg


I love when my children can learn something first hand.  There is no substitute for seeing something and experiencing it for yourself!   This summer I was very excited to take my son to Gettysburg, PA to see the battle fields and historical landmarks of the Battle of Gettysburg.  Before we visited, we read quite a few books about the Civil War, the Battle of Gettysburg, and Abraham Lincoln.  Below are three of the books we read.  Even if you can’t make it to Gettysburg, these books can help your children learn more about this point in American history.  In my next post, I will share how these books helped us understand what we saw when we got to Gettysburg National Military Park (park info).

This post contains affiliate links.


The Cemetery Keepers of Gettysburg by Linda Oatman High


Peter Thorn was the cemetery keeper of the Evergreen Cemetery in Gettysburg.  When he was sent to fight with the Union, his pregnant wife Elizabeth stayed to care for the cemetery with her three boys.  They survived the Battle of Gettysburg by hiding in their cellar. Afterwards, they worked to bury some of the fallen soldiers.  When Abraham Lincoln came to present his speech, the family was honored for their service.


This book was a great read aloud.  It gave historical insight into Evergreen Cemetery which is still there for people to visit.  It also gave a visual image of the family hiding in the cellar.  With only one civilian causality in the Battle of Gettysburg, families mainly survived by hiding in the cellars.


Just a Few Words, Mr. Lincoln: The Story of the Gettysburg Address by Jean Fritz


This book highlights Lincoln’s life at the time of the Gettysburg address.  He was worried about his sick son at the time of the address. The book also explained Lincoln’s purpose for the speech and that he intended to keep his speech short.  Edward Everett was also mentioned in this book. Everett spoke at Gettysburg before Lincoln and was considered one of the greatest orators of his time.


This book was an easy reader book.  I like that the book came from the angle of Abraham Lincoln’s life at the time.  It did not detail events of the battle.  The reader sees the writing of the Gettysburg address as if they were watching Lincoln. It adds another perspective to Gettysburg history.


American Battle Fields: Gettysburg July 1-3, 1863 by Brendan January


Set up in chapters, this book is very informative!  It covers the factors leading up to war to the aftermath of the Battle of Gettysburg.  There are many pictures to provide visual aids.  This book is a great middle ground—not too dense, but not too basic.


Most of the detailed information about Gettysburg came from this book. The first two books provided some of the bigger picture ideas of the battle and this book filled in the details.


All together these three books provided so much information and context for our trip to Gettysburg.  I’m so glad that we found these books before our trip so that my son could connect things that he learned from the books to the real life experience.  And, after the visit it was a good idea to look over the books again and gain more insight based on our new experiences!


Coming up…..

Our trip to Gettysburg!

Empowering Parents to Teach- Books About Gettysburg

Empowering Parents to Teach- Prime or Composite

Hands-on Math: Teaching Prime and Composite

If you’ve read my math posts before you know that I strongly encourage parents to make math hands-on as much as possible.  Everything we learn is rooted in concrete experiences. Therefore,  the more hands-on experience we give our children, the stronger their mathematical foundation will be!  Even older kids can benefit from hands-on math experiences.  In this post I will show you how your child can practice the concept of prime and composite numbers in a concrete way.


Prime and Composite Numbers

Prime numbers are simply numbers that have only two factors, one and itself.  For example, 3 is prime.  The only factors of 3 are 3 and 1.  Composite numbers have three or more factors. For example, 6 is composite. The number 6 can also be divided into two groups of three or three groups of two. It’s factors are 1, 2, 3, and 6.


Teaching Tip: It is important to think about the background knowledge needed for a lesson.  In this lesson, I am assuming the child has a good understanding of multiplication and division.  The student should also understand what a factor is.  If the child does not know what a factor is, I would teach that first.


Preparation:

  • First, prepare index cards with various numbers on them.  Have a mixture of prime and composite numbers.  Don’t make the numbers too large.  You want them to be manageable.  I made cards with the numbers 2 through 14.
  • Gather your linking cubes (or other small similar items) and put them in a bowl.
  • Create two index cards labeled, “Two factors” and “Three or more factors”
  • Create two index cards labeled, “Prime” and “Composite”


Set up tray like this (or what works for you!):


Empowering Parents to Teach- Prime or Composite

Click on the picture to enlarge it and see what is on the notecards.


Activity:

1. To demonstrate the activity, I put the number 4 face up.  I wanted to use a composite number first.  I had a prime number next in line (3).


Empowering Parents to Teach- Prime or Composite


2.  Looking at the four, ask the child to take out the corresponding number of cubes.


Empowering Parents to Teach- Prime or Composite


3.  Next, ask the child if the number (4) can be divided into equal groups. Have him or her actually divide them into groups using the cubes.  You should have two groups of two.  Remind the child that two is a factor of four.


Empowering Parents to Teach- Prime or Composite


4.  Ask your child to figure out all the factors of the number 4, demonstrating the factors by grouping the cubes. Have your child list the factors on the card.


5. Have your child note how many factors the number 4 has.  Tell your child that we are going to sort the numbers based on how many factors they have. If it has two factors, place it in the “Two factors” group.  If it has three or more factors put it in the “Three or more factors” group.


6. Using a prime number next (in this case 3),  have the child take out the corresponding numbers of cubes. Ask the child if he or she can divide three into any other equal groupings.


Empowering Parents to Teach- Prime or Composite


7. Have the child write the factors on the card and put it into it’s proper group.


Empowering Parents to Teach- Prime or Composite

The child can actually write the factors on the card underneath the number 3.


8. Continue this until the child has done the procedure with all of the cards.


Empowering Parents to Teach- Prime or Composite


factorsorting2


9.  Once all the cards have been sorted, draw your child’s attention to the two groups.  Tell your child that numbers that have only two factors- one and itself are called prime numbers.  Place the index card “Prime” over the card labeled “Two factors”.  Numbers that have three of more factors are called composite.  Place the index card labeled “Composite” over the card labeled, “Three or more factors”.


Empowering Parents to Teach- Prime or Composite


10. To see if your child understands, give him or her a number and ask if the number is prime or composite.  For example, is 16 prime or composite?  He or she may be able to answer right away or may need to use the cubes. Ask the child how s/he knows this.  The child should be able to articulate that sixteen has more than three factors, possibly even listing the factors.


11. If the child is confused, you may need to try the exercise again with a little more support. Or, possibly, the child may need to work on a background skill first, such as factors.


I hope you enjoy this activity together :)


For supporting literature check out (affiliate link):


Empowering Parents to Teach- Science notebook

Notebooks and the Scientific Method

A Note about Notebooks and the Scientific Method


Our science mom, Staci, shows us how to use a science notebook to help our kids learn all about the scientific method!


I started doing Science Saturdays with my son the spring before his fifth birthday.  We tried to think of something fun and interesting to do every weekend.  From the very beginning it was important to me that we followed the scientific method and kept a lab notebook.  At the time, my son was just beginning to learn to write, he often asked how to spell things and spent a lot of time drawing pictures of his observations and dictating to me his conclusions. He has graduated to writing his own hypothesis, adding sentences to his observations and writing his own conclusions.  Now that my almost 3 year old has joined our science fun, we spend a lot of time drawing pictures of our set-ups and observations again.  If you are introducing your children to science, don’t be afraid to encourage the use of a lab notebook, no matter their ages.  They may surprise you with their observations and attention to detail!


Teaching the scientific method can seem like a daunting task, especially if you are teaching young children. The good news is that you are probably already following the process without even thinking about it.  Adding the vocabulary of the scientific method during your experiments can encourage critical thinking and reasoning skills.

Observation:  about what can you use your senses to ask a question.

Question: the why, what, or how you want to know about what you are interested.

Hypothesis: a guess about why or how something happens.

Prediction: how can you test your hypothesis and what will happen if…

Testing: conduct your experiment.  Sometimes this will lead to more questions and more testing.

Conclusions:  what have you learned from your testing.

Communicate:  tell others what you have discovered so they can learn more.

Not every step of the scientific method needs to be recorded in your notebook, but we are sure to include a few sections.  Specifically, we write a question about our experiment to highlight the purpose of the experiment.  Next we make and write a hypothesis about our experiment.  We take careful notes and draw figures of our observations.  And finally, we write a conclusion about what we have learned from our data.  Sometimes we also include questions that we thought about while learning the answers to other questions.  We call that the Circle of Science!

Does your family consider the scientific method when you are doing at home experiments?  My son’s lab notebook is a childhood memento that I treasure.  I can’t wait to keep filling it’s pages with our science fun and I hope your family can find just as much enjoyment in your own lab notebooks as we do.