rattlesnake environment

Adapting to Your Environment

Life Skills: Adapting to the Environment

You won’t find skills like this in any type of government mandated curriculum, but it is just as important! Possibly, even more important. Do our kids understand how to survive and navigate their surrounding environment? Isn’t all of this learning from school and home supposed to teach them how to become independent? Don’t forget that there is more to learn that how to add!


Do your kids know what to do when they encounter different kinds of animals that live near you? Do they know to leave raccoons alone? Does your teenage driver know to watch out for deer on the road? Or moose? Are they gentle with bugs so they don’t get squished? Have they learned not to anger a bee or wasp? And whatever you do, don’t squash a stinkbug! They list is endless and will vary based on where you live. It’s not about teaching them to fear other creatures, but how to respectfully live beside them so we all can survive.


Some animals are pretty aggressive and we teach our kids to never go near them- like alligators! Of course, I make sure my children know that it is ok to protect ourselves, we only harm an animal in self defense if that ever happens. The more they understand about animals, bugs, fish, etc., the better they can live peacefully with them, help them, and protect themselves against them if needed.

Empowering Parents to Teach Rattlesnake Sign


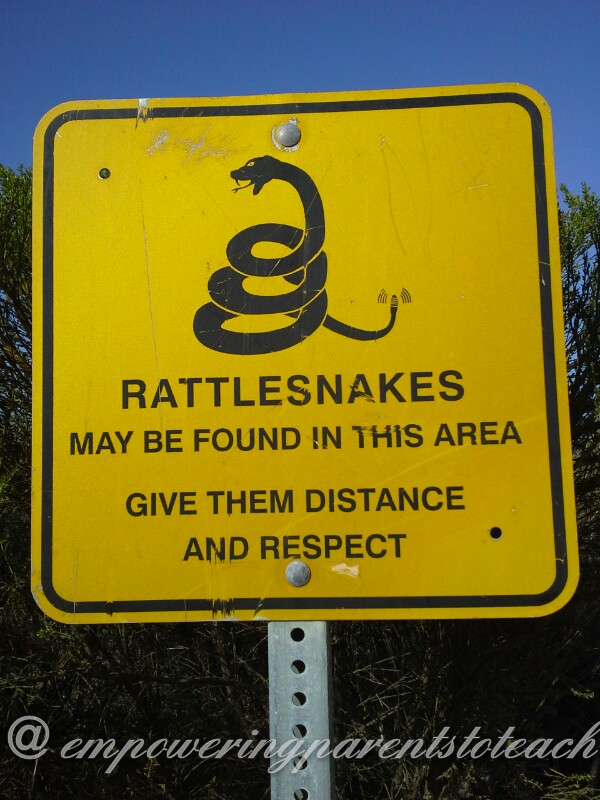
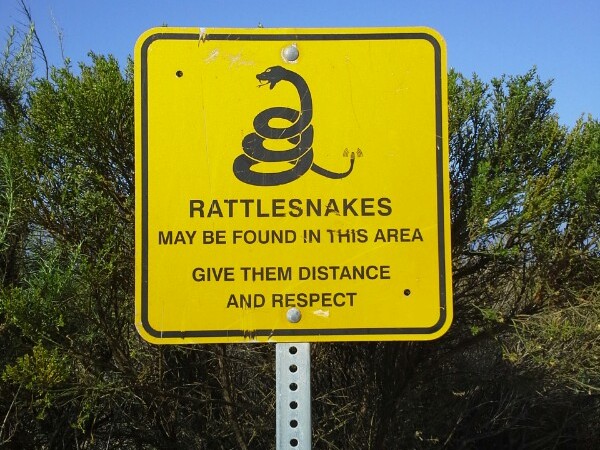
That is where our rattlesnakes come into the story. Where we live there are signs like this warning of rattlesnakes on many of our nature trails and some playgrounds. Do we avoid those places? No, we don’t, but I have taught my children about rattlesnakes and what to watch out for. These particular areas have rare encounters with the snakes. Here is what we’ve learned:


  • The places we frequent have cleared paths, we are not walking through untouched growth. It is more likely the rattlesnakes live in the more “natural’ areas of the preserve or playground. Sometimes, they may be out in the open path to sun themselves.
  • Snakes can sense the vibrations of our walking feet. They are more scared of us than we are of them. They will try to avoid us if they can.


nature path

Most likely the snakes would be on the sides with the natural growth, not the walking path.

  • They would likely only to strike us if they felt that we were trying to harm them, intentional or not. Never go near the snake.
  • If you see a hole in the ground- DO NOT try to put your finger or a stick in it! They hide in holes. I will point out any holes I see so they understand what to avoid.
  • If we happen to see a rattlesnake on the trail, we do not approach it. Give it lots of room to retreat. This hasn’t happened to us yet, thankfully! But we teach the kids just in case.
  • If the snake rattles his tail, he is mad and feels like he is danger. He is about to strike. This is when you know you are in real danger.
  • Lastly, of course- They are poisonous. If bitten get help immediately!


Reinforcing Understanding

We have done a couple of things to reinforce our understanding of rattlesnakes and how to share the environment with them.


First, we went to a local nature park that has a rattlesnake in a glass case so the kids know what one looks like. This helps the kids identify the rattlesnake. I pointed to the rattle and reminded them that if they ever hear the rattle, they know the snake is mad and about to strike.


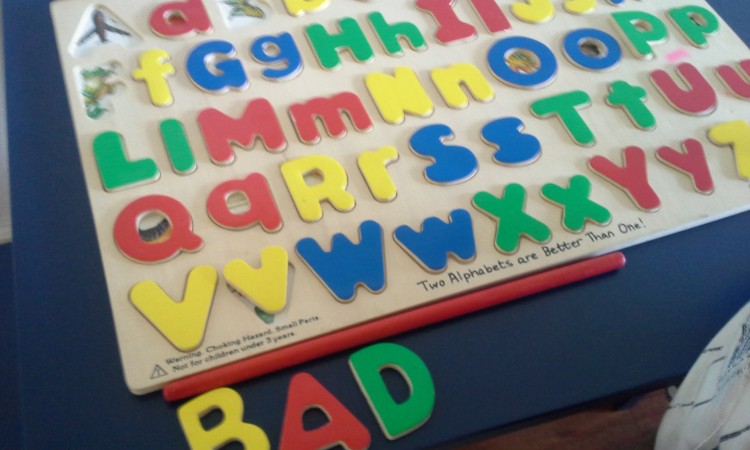
Second, we did some role play. My oldest son had a couple of snake puzzles. On one puzzle you see a rattlesnake in the desert. A large bird is swooping down with his talons open approaching the snake. The rattlesnake’s tail is up as if he is rattling. I explained to my son that the bird appears to be attacking the snake so the snake is trying to defend himself. He is rattling his tail to let the bird know that he is going to get him! Based on this we made up a game.


My son pretended he was the bird and I was the rattlesnake. I held a maraca in my hand to simulate the snake’s rattle. My son, the bird, would swoop at me. I would rattle the maraca pretending it was my tail’s rattle and he would pretend he was scared and fly away! We switched roles and played some more. He thought this was very fun. It also gave him a chance to act out how to respond to a rattlesnake’s rattle. And, since he also got be the rattlesnake, he could have a little empathy for the rattlesnake. He can see how the snake was scared of the bird, giving him insight into the snake’s natural instinct to defend himself like all creatures.


rattlesnake role play

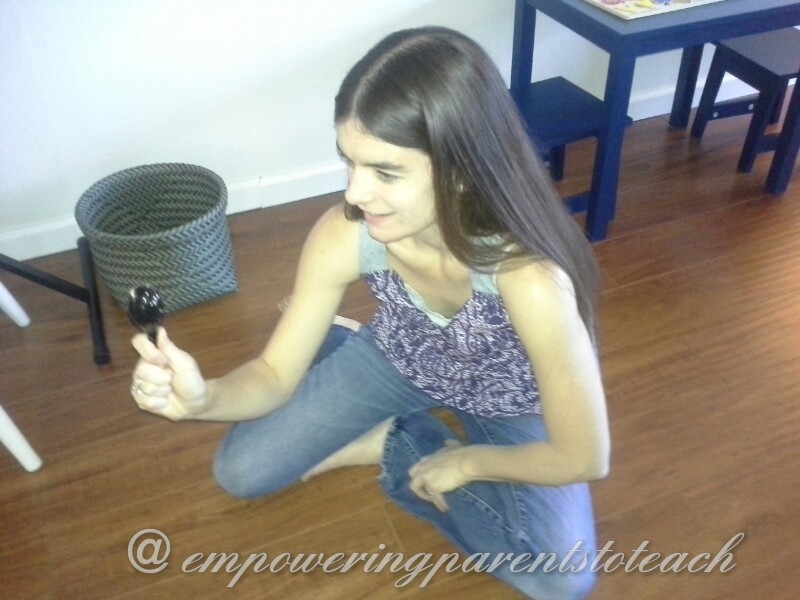
Maraca used as a rattlesnake’s tail rattle!

Finally, the library is a wonderful resource. You can find information on any type of animal. We’ve read many snake books and even watched numerous nature shows on Netflix!


Think about the animals that live near you. What can you teach your child about living together with them? Are some of them potentially dangerous? How can you teach your children to protect him or herself? It is our job to protect our kids, but we also have to teach them how to protect themselves. The best protection is knowledge!


an word family tray

Learning to Read: Word Families

Decoding: Word Families

Recognizing common letter and sound patterns in word families can help children figure out new words when they read. Instead of trying to sound out each letter one by one, they can identify larger groups of letters. 


Are you helping your child learn to read at home? Reading is made up of so many elements. My goal is to give information and ideas in all areas of reading. That would be a very long post if I did it all of it in one! Today I am going to focus on one aspect– word families. Some children pick up the phonological patterns in word families naturally and do not need to be taught this skill. However, some degree of phonics instruction can be helpful for all readers. Phonics instruction has been shown to be especially helpful for struggling readers. Remember, this is just one piece of the reading puzzle!


What are word families?

Basically, word families are a group of words that have the same pattern and sound at the end. For example, the -an family would have can, fan, man, van, etc. in it’s family. As you can see they rhyme. The -an part of the word is called the rime. It is the same for all of the words in the group. The initial consonant that can be changed to create new words is called the onset.


Is your child ready to learn word families?

Can your child:

  • Recognize all the letters of the alphabet?
  • Identify all of the letter sounds individually?
  • Hear rhyming in a story?
  • Rhyme a word that’s given? (For example, if you say “hat”, can they give you a word that rhymes?)
  • Begin to spell simple words?

These are some general guidelines to figure out if this is a good step for your child in their reading practice. Typically, word families are taught in first grade and even some kindergartens. But since every child develops at their own pace, I advise parents to follow your child’s lead instead what they “should” be doing at certain ages. Like any learning activity, if your child is not into it, don’t force it! You don’t want them to lose their love of learning!


Activity #1: Make the Word and Match the Picture

Bring the tray to where you are working with your child. I like using a tray for the work materials because it helps the child focus on the task. The tray is set up so you see “an” in the middle. In the small cup on the left are the letters- m,v,c,r,p,f. On the right hand side there is a pile of pictures of- man, van, can, ran, pan, fan. The pictures are not in any particular order.

Empowering Parents to Teach- an word family tray


If you do not have letters at home, you can easily make paper letters by typing them into a Word document and cutting out each letter.

The cards look like this:


Empowering Parents to Teach- an word family cards

I made these cards using clip art pictures from Microsoft Word and printed them on card stock.

  1. If your child does not yet recognize the word “an”, explain to him or her that when the letters “a” and “n” are together they sound like “an”.
  2. Tell him or her that by using “an” we can make all kinds of new words that have the “an” sound at the end.
  3. Have your child pick a letter out of the cup. For example, they may pick up the “m”. Ask them what sound the “m” makes.
  4. Put the “m” in front of the “an” and say the “m” sound plus the “an” sound to demonstrate how you can add the sounds together to make the word, “man”.
  5. Show your child the pictures and ask him or her to match the picture to the word. This is helping your child connect the printed word to its meaning.
  6. Take away the onset, in this example it is the “m”, and leave the rime, “an”.
  7. Encourage your child to try the next letter in the bowl on his or her own. Have him or her say the new letter sound and add it to the “an” to make a new word.  Again, match the picture to the word.
  8. If it is a little bit difficult, you can model how to put the sounds together and match the picture. If they can understand what you are doing as you do it, they are learning from your modeling. If it is very difficult for him or her, then s/he may not be ready for this yet. Continue reading rhyming books until your child becomes more familiar with hearing rhyming patterns.

Empowering Parents to Teach-  an word family- man


Activity #2: Match the Word and Picture

For this activity, the child will match the word with the picture. The first activity has the child constructing the words. This second activity encourages the child to recognize the written word.

The tray is set up with all six words visible- man, van, can, ran, fan, pan. The picture cards are placed in a cup on the right hand side.


Empowering Parents to Teach- an word family matching setup


This activity is simple. You can do it one of two ways:

  1. Have the child pick a picture, say the word out loud and match the picture the corresponding word. OR
  2. Have the child read the word and then find the matching picture.

Empowering Parents to Teach- matching an words


If you choose to do both activities, I would do the first activity on one day and the second activity on the next day. You could do them both in one day, but I personally like splitting them into two days so that the child has time to reflect on the first lesson before doing the next one. You do not necessarily have to do them in a certain order. Every child is different, sometimes building the word helps them recognize the word and sometimes recognizing the word helps them build the word.


Activity #3: Easy Reader Book with -an Family

I found a fantastic website for FREE printable easy reader books: Twisty Noodle–  www.twistynoodle.com

They have an easy reader book for the -an family: Twisty Noodle’s -an book

For very beginning readers, this book has short sentences with a repeating pattern. Your child can read the book to you and s/he can even underline the “an” word in each sentence. This can be reread anytime!


Other ways to help with word families:

  1. When you are reading to your child point out words that rhyme.
  2. Have your child find the rhyming words in stories.
  3. Go on a word hunt in a book to see how many “an” words you can find! You can change this for any word family.
  4. As always, keep reading lots of books! While these activities isolated the words, hearing them in context reinforces understanding!


The more words your child learns to read by sight, the less “effort” reading becomes! By learning these common word structures they can quickly add more words into their sight recognition!

You can use these activities for any word family! If you want to teach your child more word families: List of the 37 most common word families

All of these activities only take a couple of minutes to do. I like to keep direct teaching at home brief! 

Linked to: Montessori Monday on Living Montessori Now

Montessori Monday


free play with color pasta

Free Play In The Kitchen

The benefits of free play can not be underestimated! In our busy lives we must remember to give children time to engage in free play everyday.


I was rummaging through my pantry for pasta to cook for my son’s lunch. Like most preschoolers he is very routine in what he eats, but today he reached in the pantry and asked for a different kind of pasta. He showed me the box and asked for Ditalini pasta (the small tube kind). I purchased that pasta a while ago to make colored pasta for him to play with. I explained to him that I had colored some of that pasta and he could play with as I cooked his lunch. He was excited! Luckily I prepared the play pasta months ago (recipe here), so it was all ready to go. It’s been sitting in my cabinet just waiting for the perfect play opportunity.


I simply got out the container of colored pasta and a cookie sheet. He played the entire time I cooked. He took handfuls of the pasta and dumped it on the cookie sheet. Shortly after that, he came over to me by the stove, opened the drawer by my side and took out the melon baller and small wooden tongs. He was getting tools to play with! He’s had many chances to explore the kitchen so he knew those items where in there. He must have thought of them as he was playing and wanted to use them with the pasta.

 Empowering Parents to Teach free play with pasta


First, he scooped the pasta out with the melon baller. Then, he started picking up the pasta one by one, putting them in the melon balller and pouring them out on the cookie sheet. He did this for a little while and then decided just to dump the whole container out on the cookie sheet.


Empowering Parents to Teach- free play

In motion using the tongs to put the pasta in the melon baller


That’s when my floor starting getting very messy, because his next idea was to raise the cookie sheet on one side, watch all the pasta slide to the bottom, then lift the other side making the pasta slide back the other way.


Empowering Parents to Teach- free play with pasta slide

Sliding the pasta back and forth


My floor looked like this at the end:


Empowering Parents to Teach- pasta floor

What he did he learn from all of this?

  • Independence and Competence: He was in charge of his own play. He governed how the play would proceed and he was successful in finding tools for himself.
  • Fine motor skills: Using the tongs to place the pasta in the melon baller, he was practicing fine motor skills.
  • Logical Reasoning: He wanted something to scoop the pasta with, so he figured out what he could use to fulfill that need.
  • Divergent Thinking: Since the melon baller was made for a specific purpose, he showed divergent thinking by using the object for a purpose other than what it was intended for.
  • Science: As he moved the cookie sheet, he was testing what would happen to the pasta as he raised the cookie sheet from side to side. He learned to experiment with ideas. He even got a little mini lesson in gravity.


My job this time was to stay out of his way and let him explore!


This particular activity is NOT appropriate for all kids as the pasta was hard and uncooked making it a choking hazard for babies and unsupervised toddlers.


Bonus– He wanted to cook the colored pasta to see what happens to it when cooked. Little did we know that it would take the color right off!

Empowering Parents to Teach- cooked color pasta

What Makes a Good Math Word Problem?

Our son was showing signs of interest in finance, business, and investing so we wanted to provide him with a good, practical, mathematical word problem.  We started a series of problems that focus on finance and the first one we gave him was a basic lesson in income and expenses.   This problem is a great exercise for a number of reasons.  First, it teaches fiscal responsibility and gives the student an idea of what certain essentials actually cost, something that is not highly focused on in most elementary education and perhaps should be.  Second, it causes the student to keep track of the information in the problem, perhaps by use of a table with two columns:  income and expenses (our son used a separate sheet of paper).   Third, it empowers the student to help the character described in the narrative (Jimmy in this case) and provides relevance as the student is applying skills relative to a job they have been hired for.  Fourth, it asks practical questions that force the student to think, generate original ideas, and compare or test those ideas.  The first question doesn’t simply ask a rote math question such as “What is the sum?” or “How much is left?”  It asks the student if Jimmy can afford something which forces a comparison of numbers that are found only after a number of proper calculations.  The second question is great because it forces the student to think critically, gives them freedom to decide, and causes a change in the outcome.  Additionally, there is no wrong answer.  In this case, our son advises that Jimmy forgot to include “food and water” in his calculations and assumes it will cost $250 per month, which is reasonable.  This problem can extend to other mathematical applications as well—use your imagination!  From this exercise and more like it, a student can practice basic math, but also keep track of information, make needed comparisons, and provide empowering advice!

Empowering Parents to Teach- Finance word problem

spelling with alphabet puzzle

Preparing for Curious Minds

How Can a Parent Encourage Self Directed Learning at Home?

My youngest child loves to play a make believe game where he is going after bad guys. He turns almost anything into a pretend weapon. Ask any parent of boys and they will tell you that even if you keep all play weapons out of your house, your son has the ability to pretend any toy is a weapon!


On this day, he and I were playing a game of chasing bad guys with his pretend weapon that he made out of Tinker Toys. He passed by his small child size table where his alphabet puzzle was placed. Upon looking at the puzzle, he started making the “B” sound. I stood back and watched to see what he was doing. I heard him saying the word, “bad”. He took the ‘B’ off of the puzzle and placed it on the table. I immediately realized that he was trying to spell the word “bad” as in “Bad Guys”, the name of his game. He continued to sound out the word attempting to figure out the next letters. This is a developing skill for him, he has not yet mastered this. He’s pretty good at hearing beginning and ending sounds on his own, but middle sounds are still tricky for him. Knowing this about him, I came to his side and modeled for him how we say each sound slowly and clearly so that we can figure out what letter to put next. With me saying the sounds that came next, he was able to match the sound to the letter and correctly spell the word. Obviously this doesn’t work for all words since there are so many special cases in English. In fact, he wanted to spell the word “guy” next so after he figured out the first letter I just told him the rest!


He was motivated to do this task because it helped him in the creation of the game he made up. He had a true purpose for using this skill so he had the motivation to learn it. The desire to learn came from him, not my desire for him to learn it. The difference between the two is huge. If I would have said, “Let’s go spell ‘Bad Guy'”, his level of motivation may not have been the same. He chose to spell the word, therefore he already entered the task with a real interest in understanding how to spell.


The parent role is not passive. In this example, my role started even before the event happened. By having the puzzle available to him whenever he needed it, I was helping to prepare his environment with letters that he can move whenever he wanted. Once he started the task, my role was to help him when it was appropriate. In this case, I modeled for him how to sound out a word to spell it. It is always a matter of judgement when we should step in and help or let them be to figure it out on their own.


Children are curious. If you prepare their environment and help them when they need it, you are guiding their  learning. Observe your children. What interests them? Is there something they have never tried before? This will help you decide what are good tools, toys, pictures, and objects to have in your house to pique their curiosity!


This example was how I helped prepare the home environment with engaging toys that serve multiple purposes. To keep this in context, remember– exploring the outdoor environment is incredibly enriching, complex, and open ended (meaning there is more that one way to play). Free play with in a safe environment is essential to their development also!