Empowering Parents To Teach- eeboo give away

eeboo Tell Me A Story Cards- Give Away


This contest is now closed. The winner has been contacted and the prize was mailed.


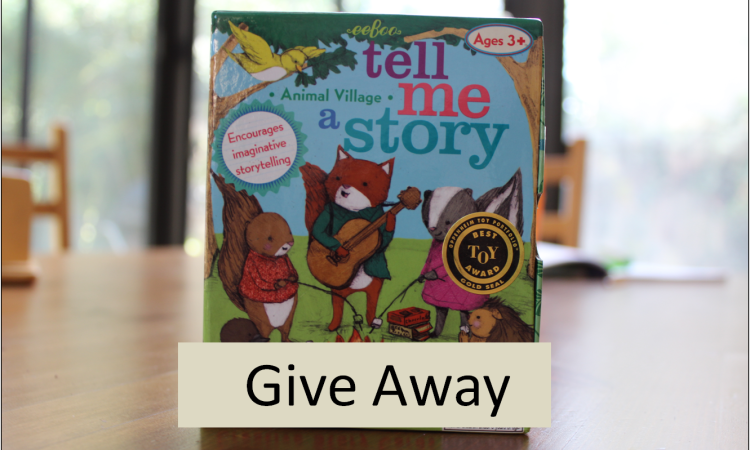
As a thank you for being such a wonderful part of the Empowering Parents to Teach community, I’m giving away one package of these adorable story telling cards made by eeboo to one lucky winner.


The illustrations on these cards are perfect for children of many ages. Your child can tell you a story orally or create a written tale based on the pictures.  You can even use these with toddlers describing what you see in the illustrations!  I love open ended materials like this.  As an added bonus, they are not a bug, bulky toy adding clutter to your toy room!  They are small enough to put in a purse or bag, perfect for times when you need something handy, like in a restaurant, waiting in a doctor’s office, going on an airplane, or entertaining a little one at a sibling’s soccer practice!


How to enter:

There are two ways to enter:

1. Visit Empowering Parents to Teach on Facebook.   “Like” the Give Away status with the picture of the cards and leave a comment saying, “Just entered to win.”  You must leave a comment, or I can’t tag you to let you know if you’ve won!

2. Follow us on Twitter and tweet the phrase, “@EmpoweringPTT, Enter me to win!”  You must use include @EmpoweringPTT in your tweet or I won’t see your message!


These social media outlets are not in any way responsible for or in endorsement of this contest.


Details:

The contest begins on Wednesday, Feb.18, 2015 at 7am PST/4am EST and ends at 8pm PST/11pm EST on the same day.  A winner will be chosen at random and notified via Facebook, Twitter, or email. The winner must respond to this notification within 48 hours. If the winner does not respond within this time frame, the prize is forfeited and a new winner be will chosen at a random. Open to United States residents only.


Good luck and thank you again for being so awesome :)


Empowering Parents To Teach- Mardi Gras Race

Mardi Gras Race

After reading the book, A Catfish Tale: A Bayou Story of the Fisherman and His Wife by Whitney Stewart, I realized that Mardi Gras was right around the corner and my kids knew nothing about this holiday!  I decided that this year, they will learn all about Mardi Gras. I began by designing a fun Mardi Gras race that incorporated a lot of different elements found at Mardi Gras.


Let the race begin!

The race has four stations with an activity to complete at each one. Every activity reinforces the concept of Mardi Gras. To win the race, the kids will race each other to be the first one to complete all four stations.


I did this race with my own boys. Before we began, I walked the boys through each station explaining what they were supposed to do and the significance of the activity.


Station 1:  Put On Your Costume


Empowering Parents To Teach- Mardi Gras


We learned from our book that during Mardi Gras there is a big parade.  People often dress up as kings, queens, jesters, or clowns.  You often see people wearing masks.  The very first station had  jester hats in Mardi Gras colors (purple, gold, and green) and masks to put on.  Once they had their hats and masks on they rushed to the next station.


Empowering Parents To Teach- Mardi Gras

IMG_1348


Station 2:  Find The “Baby”


Empowering Parents To Teach- Mardi Gras


I explained to my kids that during Mardi Gras people eat a special cake called a King Cake.  Hidden in the cake is a small plastic baby.   The person who finds the baby in their piece of cake has good luck and they have to buy the King Cake next year.


In this activity, the kids will have to find the “baby” hidden in Mardi Gras colored pasta.  I did not have a baby small enough to hide, so I thought of Lego figures.  To make it even more challenging, I actually only hid a Lego head in the pasta mixture.


The “babies”:

Empowering Parents To Teach- Mardi Gras


Hide the “babies” in colored pasta:


Empowering Parents To Teach- Mardi Gras

See the baby?

Empowering Parents To Teach- Mardi Gras

Now it’s hidden!


Ready to go:

Empowering Parents To Teach- Mardi Gras

Outside, ready to go!


Empowering Parents To Teach- Mardi Gras

Searching for the Lego head (a.k.a baby)


Station 3: Throw The Beads


Empowering Parents To Teach- Mardi Gras


It wouldn’t be Mardi Gras without those plastic beaded necklaces.  Parade goers excitedly try to catch beaded necklaces that are tossed out.  In this activity, the kids have to throw the beaded necklaces around the wooden posts (our parade goers).  This was the trickiest station.  It was very challenging for the boys and my youngest just ended up placing the beads on!


Each kid had three necklaces to throw.  They were told ahead of time who got green and who got purple.


Empowering Parents To Teach- Mardi Gras


Their attempts:


Empowering Parents To Teach- Mardi Gras


Empowering Parents To Teach- Mardi Gras


Station 4: Make Music


Empowering Parents To Teach- Mardi Gras


To finish the race, the boys had to pick one instrument and do three laps around the yard playing their instrument. This activity reinforced the importance of music!


That’s the end of the race!


To continue our Mardi Gras learning, we will read these books:


We will practice our French with these super cute cards:


We will also make our very own King Cake and hide a Lego minifigure in it (after baking of course!)

Empowering Parents To Teach- Mardi Gras


*This post contains affiliate links


Empowering Parents To Teach- One Fish Two Fish Red Fish Blue FIsh

One Fish Two Fish Red Fish Blue Fish Number Activity


Inspired by the book One Fish Two Fish Red Fish Blue Fish  by Dr. Suess, this fun activity helps your child practice counting and one to one correspondence, all while strengthening his or her fingers opening and closing clothespins. You can also adapt this activity for different learning levels or use the free printable materials any way you want. Details on how to do that can be found at the end of this post.


Materials:

Fish (page 1 has fish with numbers, page 2 has fish without numbers) print

Bowl or pail

String or yarn

Tape

10 Paperclips

10 Clothespins


Set up:

  • Print the fish.
  • Hang a piece of string between two objects.
  • Using the paperclips, attach the fish in order from 1 to 10.


Empowering Parents To TEach- Red Fish Blue Fish One Fish Two Fish


  • Write dots on the clothespins with the number quantities from 1 to 10. Place the clothespins in a pail, bowl or any container you have.


IMG_1289


Activity:

1. Have your child pick a clothespin out of the pail or bowl.

2. Count the number of dots.


IMG_1297


3. Find the fish that has the corresponding number.

4. Use the clothespin to grab the fish off of the line.


IMG_1295


This is a simple activity with so much learning going on!  Encourage your child to only count each dot once.  If s/he counts too fast, too slow, or skip dots work together with your child to show him or her how to count the dots correctly.


But wait, there’s more!


You can adapt this for different levels or different subjects

Make it easier:

  • Write  numbers on the clothespins and have your child match the numbers.

Make it more advanced:

  • Change the clothespins to addition of subtraction facts.

IMG_1300


  • Change the clothespins to tally marks. Match the tally marks to the corresponding number.


  • You can even get rid of the yarn and have your child order the numbers from 1 to 10.

Empowering Parents To TEach- Red Fish Blue Fish One Fish Two Fish


Make it a different subject:

First, print the fish without the numbers. You can make this activity into anything with them!


Foreign language

  • Write the number in a different language on the clothespin–  Spanish, French, Russian, etc.


Empowering Parents To TEach- Red Fish Blue Fish One Fish Two Fish


ABC/Reading (Use the blank fish)

  • Write words on the fish: Match the words to the same word on the clothespin (sight word practice).   Match the word to a rhyming word on the clothespin (phonemic awareness).


  • Write letters on the fish: Match the letters to the same the letter on the clothespin (letter recognition). Match the letters to a word on the clothespins that begins with that letter (phonemic awareness).


Grammar (Use the blank fish)

  • Write words on the fish and label clothespins with the parts of speech. Match the word to its part of speech.


Vocabulary (Use the blank fish)

  • Write a definition on each fish and the vocabulary word on the clothespin. Match the word to its definition.


The possibilities are endless! Share your ideas here or on our Facebook page.


To purchase the book, click here:

*Amazon affiliate link. If you make a purchase I receive a very small percentage of the sale at no extra cost to you! Thank you so much for your support.

Empowering Parents to Teach- Divisibility Rules Activity

Divisibility Rules Activity

As your child progresses in math, divisibility rules come in very handy. This activity focuses on the divisibility rules for 2, 3, 4, 5, 6, 9, and 10. There are rules for more numbers, such as 8, 9, and 11 etc., however, I will focus on the ones previously listed. With these first seven rules learned your child will have a strong start with the most commonly used, and taught, divisibility rules. There are many uses for divisibility rules, such as prime factorization, fraction work, and of course division.


First, print out a divisibility rules chart for your child to use a reference. I created a very simple chart that is small enough to cut out and paste in a math notebook if needed. Show your child how s/he can determine if number is divisible by either 2, 3, 4, 5, 6, 9, or 10 by following the rule for each one listed. I would go through them one at a time, making sure your child understands as you go along.


Materials needed:

Divisibility Rules Chart (click here)

Activity Printout (click here)

3 Dice

Pencil


Activity:

  1. Roll 3 dice.
  2. Put the dice together in a line. Use the numbers on the dice to form a three digit number.
  3. Referencing the divisibility rules chart, determine if the number is divisible by 2, 3, 4, 5, 6, 9, and 10.  Your child may need your help for the first one to get the hang of it.
  4. Put an X in the box of any divisible factors. For example, 246 is divisible by 2, 3, and 6 so the child should check the boxes for 2, 3, and 6.
  5. Repeat the process with more three digit numbers.


By the end of the activity, your child should become more and more comfortable with the rules and may even have them memorized.


Here’s a picture of my son doing the activity.  As you can see he modified the instructions by using check marks and Xs :)

Empowering Parents to Teach- Divisibility Rules Activity


Try this activity next:


Empowering Parents To Teach: Factor Trees

Click here for the activity


Empowering Parents To Teach: Factor Trees

Do you remember making factor trees when you were younger?  You started with a number and began breaking it into factors until you reached all prime numbers.  The factor tree was a way of finding the prime factorization of a number.


It looked like this:

Empowering Parents To Teach- Factor Trees


I decided to make this idea a little more hands on by making factor trees with leaves and sticks.


Materials:

  • Printable leaves (click here for the FREE printable in Green or B&W)
  • Sticks (I collected mine from outside and cut them to be roughly the same length)
  • Whiteboard marker or pencil


Activity:

1. Print out the leaves in color. Or, if you are like me and have a printer that refuses to print color, print the black and white leaves on green cardstock.


2. Laminate the leaves if possible. Your child can write on the leaves with the whiteboard marker and erase when finished, allowing you to use the materials as many times as you want. If you don’t laminate the leaves, your child can simply write on the leaves with pencil, pen, or marker.  Just be sure to print enough leaves, since you can not reuse them if they aren’t laminated.


Empowering Parents to Teach- Factor Trees


3.  Take out one leaf and write a composite (not prime) number on it. For demonstration purposes, I will use 45 as the example number. On the leaf I would write 45 and place the leaf on the working surface (floor, table, or paper) with enough room underneath the number to work down.


Empowering Parents to Teach- Factor Trees


4. Have your child name two factors of the number, excluding one and itself. For example, with 45 your child might say, “9 and 5″ or “3 and 15″.  Choose only one set of factors.


5. Show your child the sticks and tell him or her to place two sticks under the 45 to show that we are splitting the 45 into two factors. In this case, we will use 9 and 5. Next, have your child take two leaves and write the factors on the two leaves. Write one factor per leaf.


Empowering Parents to Teach- Factor Trees


6. Ask your child if any of the numbers that s/he just wrote can be broken down further. Your child should notice that the 9 can be broken down into 3 and 3. Repeat the process of placing sticks and leaves.


Empowering Parents to Teach- Factor Trees


7. Once again, look at the numbers and determine if any of the numbers can be broken down into two factors. In this case, all the numbers are now prime. The process is done.  Depending on your starting number, the process may be longer.


8. Explain to your child that once they have reached only prime factors, they have found the prime factorization of the number.  Have your child list the prime numbers that s/he ended with. In our example, it would be 3,3,5.


9. Show your child how we can write that as 3x3x5.  If your child is comfortable with exponents, show him or her how to write the prime factorization as 32 x5.  Have your child do the multiplication of 3x3x5 to clearly illustrate how the prime factorization is still the same value of 45, it’s just written differently.


10. Continue the procedure with more numbers.  Keep working for as long as your child is interested. Note: If this activity is too challenging, your child may need to review factors, or prime and composite numbers. Click here for an activity to teach prime and composite numbers.


11. If your child keeps a math notebook, have him or her record one of the factor trees in the notebook.  Be sure to write out the prime factorization too. This will serve as a reference and provide practice with writing factor trees in the standard format (as seen above). Another option would be to have your child paste a stick and leaf factor tree into the notebook (substituting the sticks for pencil lines).


Have fun :)


Try these activities:


Empowering Parents To Teach- Divisibility Rules Activity

Click here for the Divisibility Rules Activity


Empowering Parents to Teach- Prime or CompositeClick here for the Prime or Composite Lesson


 Empowering Parents to Teach- Pythagorean TheoremClick here for the Pythagorean Theorem Activity