Empowering Parents To Teach- Greek and Latin

Greek & Latin Roots and Affixes

With over sixty percent of English words stemming from Greek or Latin, one can see why familiarity with these roots and affixes can be valuable to students.  


Many prefixes, roots, and suffixes come from Greek and Latin.  These roots and affixes can be directly taught and studied or learned as the words are found in reading and writing activities.  For example, when we studied ecosystems in our homeschool, the words “biotic” and “abiotic” came up in our reading. This gave us the perfect opportunity to learn that “bio” means life and it comes from the Greek language. The suffix -ic, comes from Latin and means characterized by, or pertaining to.  Knowing this, it could help my son remember that the word biotic means the living things in an ecosystem. It can also help him in the future to solve an unknown word with “bio” or “ic” in it.


We also learned that the prefix “a” can mean not. With this knowledge, he can remember that abiotic refers to the non-living things in the ecosystem.  “A” means not and “bio” means life and “ic” means characterized by or pertaining to. By knowing these roots the definition is spelled out for him. Once again, these roots and affixes show up in many words, so by knowing them he is adding to a knowledge base that can help him determine the meaning of an unknown word.


To keep this knowledge, it’s helpful to record the roots and affixes that are learned.  I created a simple table to help your child record and organize the roots and affixes that arise in his or her studies. In our homeschool, I have my son record new roots and affixes that we learn along the way. He can then use the table as a reference in figuring out the meaning of new words that he encounters.  With enough recording and referencing, these roots and affixes can be memorized.


Making a chart is simple; You can easily create a chart to meet your child’s needs. To make things even easier, you can click on the link below for a free printable table to use:

Greek and Latin Roots Printable Table


For a great reference to look up the meaning unknown roots and affixes to include on your list click here.


Empowering Parents To Teach- Learning_CH_Sound

Learning The Sound “CH” With Lunch

Helping your young reader learn what sound the letters “ch” make when they are together in a word can be as simple as serving lunch or chinner.


You are about to serve a very special lunch or dinner, but first, start with a book.  We found the book Chilly Charlie by Dana Meachen Rau at our local library.  I decided to use this story to teach my little one the sound that “ch” makes and you can too!  There are many other books that you can use, such as:


Please Note: This post contains affiliate links.  Meaning, if you click on a link and make a purchase, I receive a small portion of the sale at no extra cost to you.  


Show your child the book and read the title.  Point out the “ch” in the word(s) and tell him or her that when “c” and “h” are together they make a new sound, “ch”.  Have your child say the sound a few times.  Say it with them, being funny usually helps! Whenever you come to a word in the story that has “ch”, exaggerate the sound a little bit to draw attention to it.  Sometimes, I would even say, “Look, that word had “ch” in it. Did you hear it?”.  Continue reading the story together and listening for the “ch” sound.


Now for the really fun part!  Later in the day or night, serve them a fabulous lunch or dinner featuring the “ch” sound.


Empowering Parents To Teach- CH_Sound


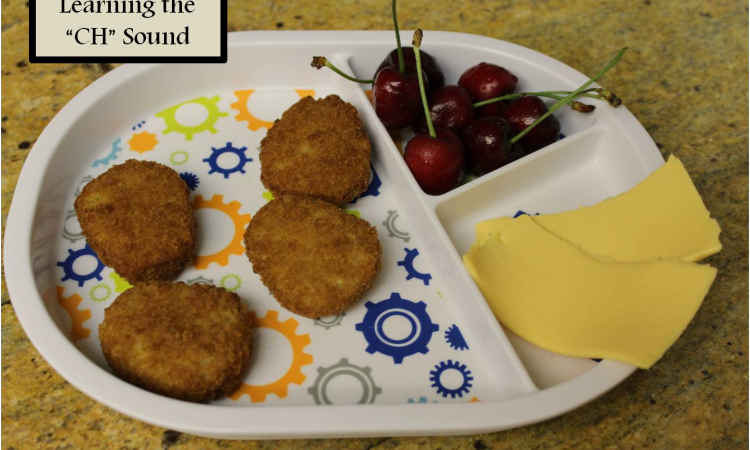
Notice the Chicken nuggets (meatless for us), Cherries, and Cheese?


Purposefully fill the plate with “ch” foods.  You can even have chips or chocolate milk!  When you present the meal to your child tell him or her that the meal is very special.  Say the name of each food out loud. First, see if s/he notices that they all start with the “ch” sound.  If s/he doesn’t notice, tell your child that you have prepared them a “ch” (say the sound) lunch or dinner!!  I did this at dinner time but I told my son that it was actually “ch”inner not dinner.  He thought that was pretty funny and the dinner started off on a positive note.


As you eat, talk about the “ch” words that your child is consuming.  You may ask, “How are those cherries?”, accenting the “ch” sound when you speak.  I had to tell my child to stay in his ch-ch-chair.  He hid his food in his ch-ch-cheeks! This made us wonder what other body parts start with “ch” like cheeks. Chin, of course!  My little one pointed to his nose and called it his “chose” to be funny.  Eureka, he gets it!


You could even look for things on the table and figure out if they have “ch” in the word.  How about, “salt”, “napkin”, or “chipmunk”?  Why you have a chipmunk on the table, I do not know.  But I don’t judge.


The secret is— HAVE FUN!! The more fun you have together playing with the “ch” sound, the more memorable the time spent will be.  Your ch-ch-child will remember the “ch” sound as well as the fun bonding time with you. What could be better? :)


Looking for more fun learning activities? Try:

Empowering Parents To Teach- Word Family Hearts


Valentine’s Day Word Family Hearts (with FREE printable)


Empowering Parents to Teach- Parcheesi


My Secret Weapon To Teach Early Math Skills


Empowering Parents To Teach- Charlotte's Web


Charlotte’s Web Activities


Empowering Parents To Teach- Word Family Hearts

Special Delivery: Valentine’s Day Word Family Hearts

Once your child has mastered the individual letter sounds, word families can be the next step in your child’s phonological awareness. Word family is a term that refers to words that have the same ending letter pattern and corresponding sound.  For example, cat, bat, rat, all end with -at, therefore, they are all in the -at family.  I talk more about word families in the post, Learning to Read: Word Families. If you would like more information on what word families are and why they are helpful for young readers, take a minute to visit that post before doing this activity.


Materials:

  • Word Family Hearts (print here: Color version or B&W version)
  • Word Family Label (I made these by cutting index cards)
  • Tray with at least four compartments or small boxes, or small mailboxes (use what you have available)
  • Small Paper Bag
  • Markers or Crayons

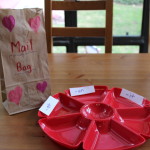
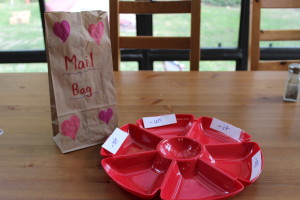
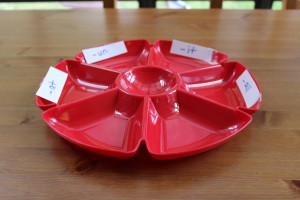
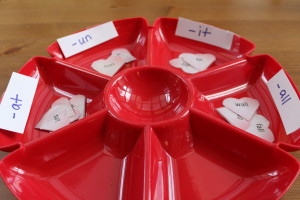
Here’s what our set up looked like:


Empowering Parents To Teach- Word Family Hearts

The materials set up


Before the Activity:

1. Print and cut out the hearts. Laminate them if possible.

2. Decorate the small paper bag to use as the Mail Bag.  You could also have your child do the decorating!

3. Fill the mail bag with the small hearts.

4. Attach the word family labels to your boxes, tray, or mailboxes.


Activity:

1. Inform your child that today s/he is going to deliver hearts, just like people deliver valentines to their friends on Valentine’s Day.

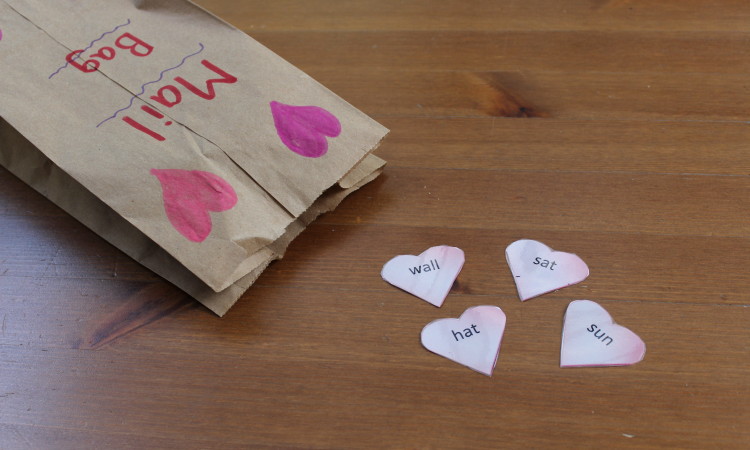
2. Show your child the mail bag and let him or her know that inside the bag are hearts.  Each heart has a word on it.  His or her job is to deliver the heart to its right place.

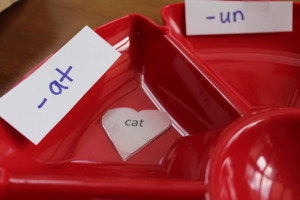
3. Next, show your child the tray (or mailboxes) with the word family labels.  Tell your child that s/he is going to put the word with its family.  Look at each word family label and have your child read the rime*. Help your child if needed.  Remind your child that any word that ends with -at, goes with the -at family. Do this for each family. Just like family members all have the same last name, word families have the same last sound. You want to explain this in a way that makes sense to your child.


*Rime refers to the part of a word that follows the initial consonant or group of consonants.  For further information about onsets and rimes, click here.
 

Empowering Parents To Teach- Word Family Hearts


4. Have your child take out the first word.  For the first word, you will want to walk through the activity with your child.  Have your child read the word out loud.  Ask your child what sound they hear at the end, is it -at, -un, -it, or -all?  I would say each one aloud while pointing to the word family label.  Say the word again if necessary.  Your child should be able to hear the end sound (the rime) and match it to the correct family.


Empowering Parents To Teach- Word Family Hearts


5. If your child struggled, do the next one together. Model your thinking out loud.  For example, if you take out the word “sun”, read the word and verbalize your thought process. You may say, “I will look at the word families and say each one out loud to what matches.” “At, sun, hmm, they don’t sound the same at the end so they don’t rhyme. Un, sun, they sound they same at the end! They rhyme! The word ‘sun’ goes here with the -un family.”


6. Let your child do the rest by himself (or herself), providing support when needed.  If your child places one in the incorrect spot, take the word out and help him or her figure out the correct place.


7. Keep playing until all the hearts are delivered!

Empowering Parents To Teach- Word Family Hearts


As always, keep it fun! Your child is learning so much from you!


More reading activities:

empoweringparentstoteach an wordfamilyman


 Learning to Read: Word Families


Empowering Parents to Teach- Sight Word Hide and Seek


Sight Word Hide and Seek


Empowering Parents To Teach- Sentence Making


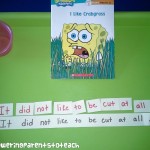
Sentence Making


This post is linked to Montessori Monday. Click on the link below to see more fun learning activities!

Montessori Monday

Empowering Parents to Teach- Sight Word Hide and Seek

Sight Word Hide And Seek

With enough exposure, sight words become easily recognized to a new reader. This game gives a fun opportunity to increase a child’s experience with these words!  Kids have to pay close attention to the words on their lists as they search to find hidden sight words.


Materials:

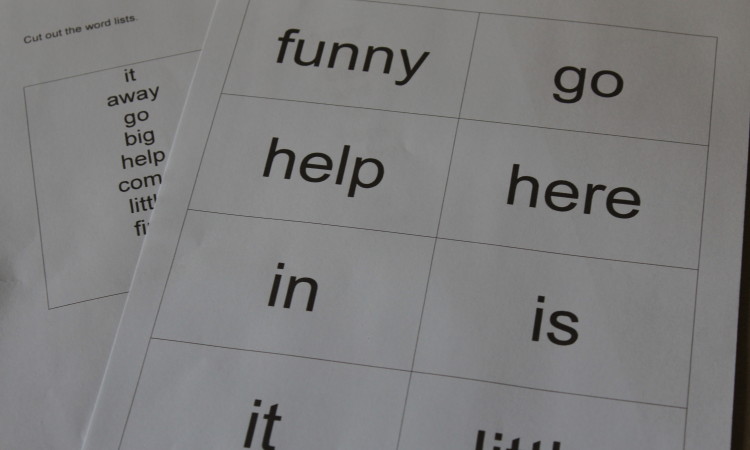
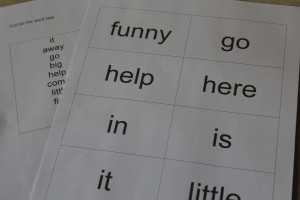
  • Sight word cards to hide (print out materials below or make your own on index cards)– For longevity, it’s best to print them on cardstock or laminate them. You can also print them on different color paper so the child can easily recognize them when searching.
  • List of words to find

You can make your own words to hide depending on what your child is learning or you can use the materials I created.


Empowering Parents to Teach- Sight Word Hide and Seek

Click here for the free printable materials


How to play:

1. The adult hides all sixteen words.  The younger the child is, the easier they should be to find. 

      How I hid them for my four year old:

Empowering Parents to Teach- Hide  and Seek Sight Words

 Hide  and Seek Sight Words

 Hide  and Seek Sight Words

 Hide  and Seek Sight Words

 Hide  and Seek Sight Words

IMG_0767

He thought this was hilarious!


2. The child is given a list of ten words to find.

3. Have the child read all ten words, with adult help if necessary, so the child knows what s/he is looking for.

4. Once the child finds a hidden word, s/he must check the list to see if it is one of the words on the list. Remember, there are sixteen words hidden, but only ten on the list.

5. Once all ten words are found, s/he must show them to you and read the found words out loud to you.  If all the words are the correct words on the list, s/he completed the game!  If any of the found words are not on list, have your child continue searching until the correct words are found.

6. To make the game competitive, you can set a timer.  Have your child find all ten words before time runs out.  Set the time based on what is appropriate for your child’s age and ability.

7. Play again using another word list to find the hidden words!


How is this game helpful?

As mentioned before, sight words are learned when kids see the word enough times and it becomes easily recognized.  The more words a child can read by sight, the more fluent they become as readers. In this activity, I chose words found on the Dolch sight word list that comprises commonly used words.


Often times when children try to identify a word by sight, they may just look at the first letter and guess.  With this in mind, I made sure to include more than one word using the same initial letter. By doing, this the child has to look past the first letter (hopefully at the whole word) to figure out if they found the correct word on his or her list. This can give the parent or teacher feedback. If your child brings back the wrong, “b” word, ask him or her why s/he thought that the word was correct.  After listening and understanding your child’s thought process, you can show your child how you know that the word is different. For example, if the word “big” was on the list and your child brought back the word, “blue” s/he may not be looking at the whole word. First, point out the good that your child did, s/he noticed that both words start with “b”.  After acknowledging this, you can point out to your child that when you look at the second letter the word on the list (big) has an “i” next and the word your child found (blue) has an “l” next.  This tells you that the two words are different.  Give your child another chance to find the matching word.  After this interaction with you, your child may be more likely to look at the letters in the word instead of just the beginning letter.  The goal is for your child to transfer this skill to his or her reading experiences.


I also made this a hide and seek game because it encourages movement. Kids were not designed to sit still, so I like to find ways that allow kids to move around while engaged in meaningful learning experiences!


As always, follow your child’s lead and keep a positive attitude!  As long as they are playing and having fun with these words, they are getting something out of the activity.  It may not go as planned, but the opportunity to show your child that you can have fun playing with words is priceless :)


Empowering Parents to Teach- Day of the Deer

Holiday Art: Day Of The Deer

Day of the Dead meets Christmas in this art activity


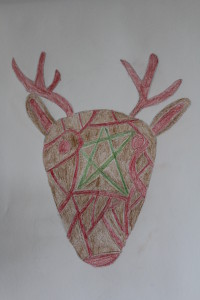
My son and I were feeling artsy.  I came up with the idea to make a Day of the Dead style reindeer.  I love the artwork on the Day of the Dead skulls and I was wondering what it would like on a reindeer face for Christmas. This intrigued him too so we decided to go for it. 


Being very technical and precise, my son wanted the reindeer face to be “just right”, so we found a book at the library to guide us on the creation of the reindeer face.  Once my son was satisfied with the shape of his reindeer’s face, we looked at a book about the Day of the Dead to refresh our knowledge of the artwork typically used to decorate the skulls.  There wasn’t too much information in the book we chose, so we ended up using the internet to see images of the skulls.


We noticed the lines, flowers, colors, and other elements that went into the skull designs. This was great practice with analyzing patterns as he had to discern the common elements among the skulls.


He made one deer using the colors and designs that he noticed from the skulls, but then we decided to use Christmas symbols to decorate our reindeer.


We brainstormed all things Christmas:

  • Santa
  • Trees
  • Snowmen
  • Snow
  • Lights
  • Poinsettias
  • Candy canes
  • Stars
  • Angels
  • Presents
  • Hot chocolate
  • Cookies
  • Peppermints
  • Elves
  • Mistletoe
  • Holly
  • Warm clothing
  • Red and Green


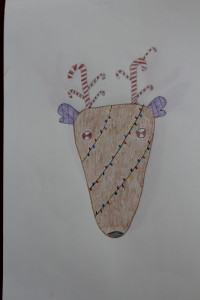
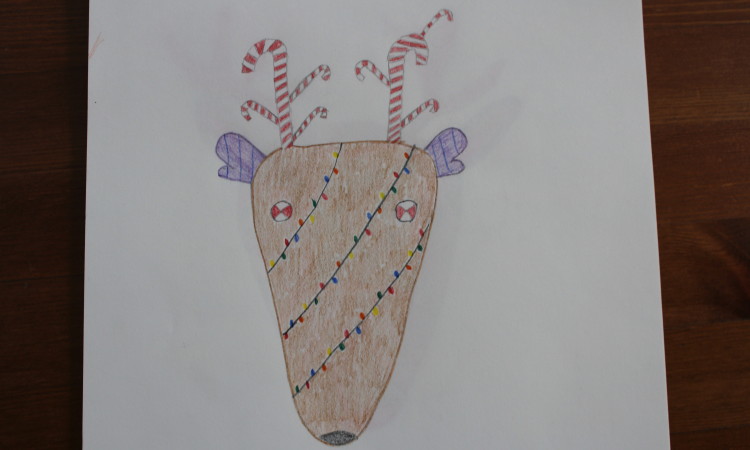
Here a couple of the reindeer that we drew:


Empowering Parents to Teach- Day of the Deer

You can see how much my little guy drew and erased to achieve his final version!


Empowering Parents to Teach- Day of the Deer

Final Version


Empowering Parents to Teach- Day of the Deer

Trying out new designs


Empowering Parents to Teach- Day of the Deer

This one was my final product


What may look like just a fun art project is really a very valuable learning experience! Through the creative process important skills are practiced,  such as research (searching through the books), analysis (synthesizing important design elements), and application of ideas (using what he analyzed to create a new project).  These skills are transferable to all academic disciplines!


What will your child’s Day of the Deer look like?